A bowl breaks. You pick up the pieces, hold them together for a moment — and instead of throwing them away, you wonder: could I fix this? That instinct is exactly where Kintsugi begins.
The good news is that you don't need to be an artist, a craftsperson, or anything other than someone willing to slow down for a couple of hours. Kintsugi is more accessible than it looks — and considerably more rewarding than you might expect. This guide walks you through everything a complete beginner needs to know before starting their first repair.
What Exactly Is Kintsugi?
Kintsugi is the 500-year-old Japanese art of repairing broken ceramics with gold. Rather than hiding the damage, you fill the cracks with a gold-tinted adhesive — turning the break lines into glittering veins that become the most striking feature of the piece.
The philosophy behind it is called wabi-sabi: the idea that imperfection and damage are not flaws to be concealed, but part of an object's story — and beauty. If you want to go deeper into the history and meaning, our earlier post What Is Kintsugi? covers it fully.
What You'll Need
Traditional Kintsugi uses urushi lacquer — a natural resin that takes months to master and requires specialist materials. Modern Kintsugi kits use food-safe epoxy resin and metallic mica pigments to replicate the same golden-vein aesthetic in a way that's beginner-friendly and safe.
A complete kit should include:
- Two-part epoxy resin — the adhesive that bonds the broken pieces together
- Metallic pigment powders — gold, silver, or other colors to mix into the epoxy
- Fine applicator tools — bamboo sticks or brushes for precise application along crack lines
- Mixing surface and spatula — for combining the epoxy components
- Finishing materials — sandpaper or polish to smooth and refine the repair
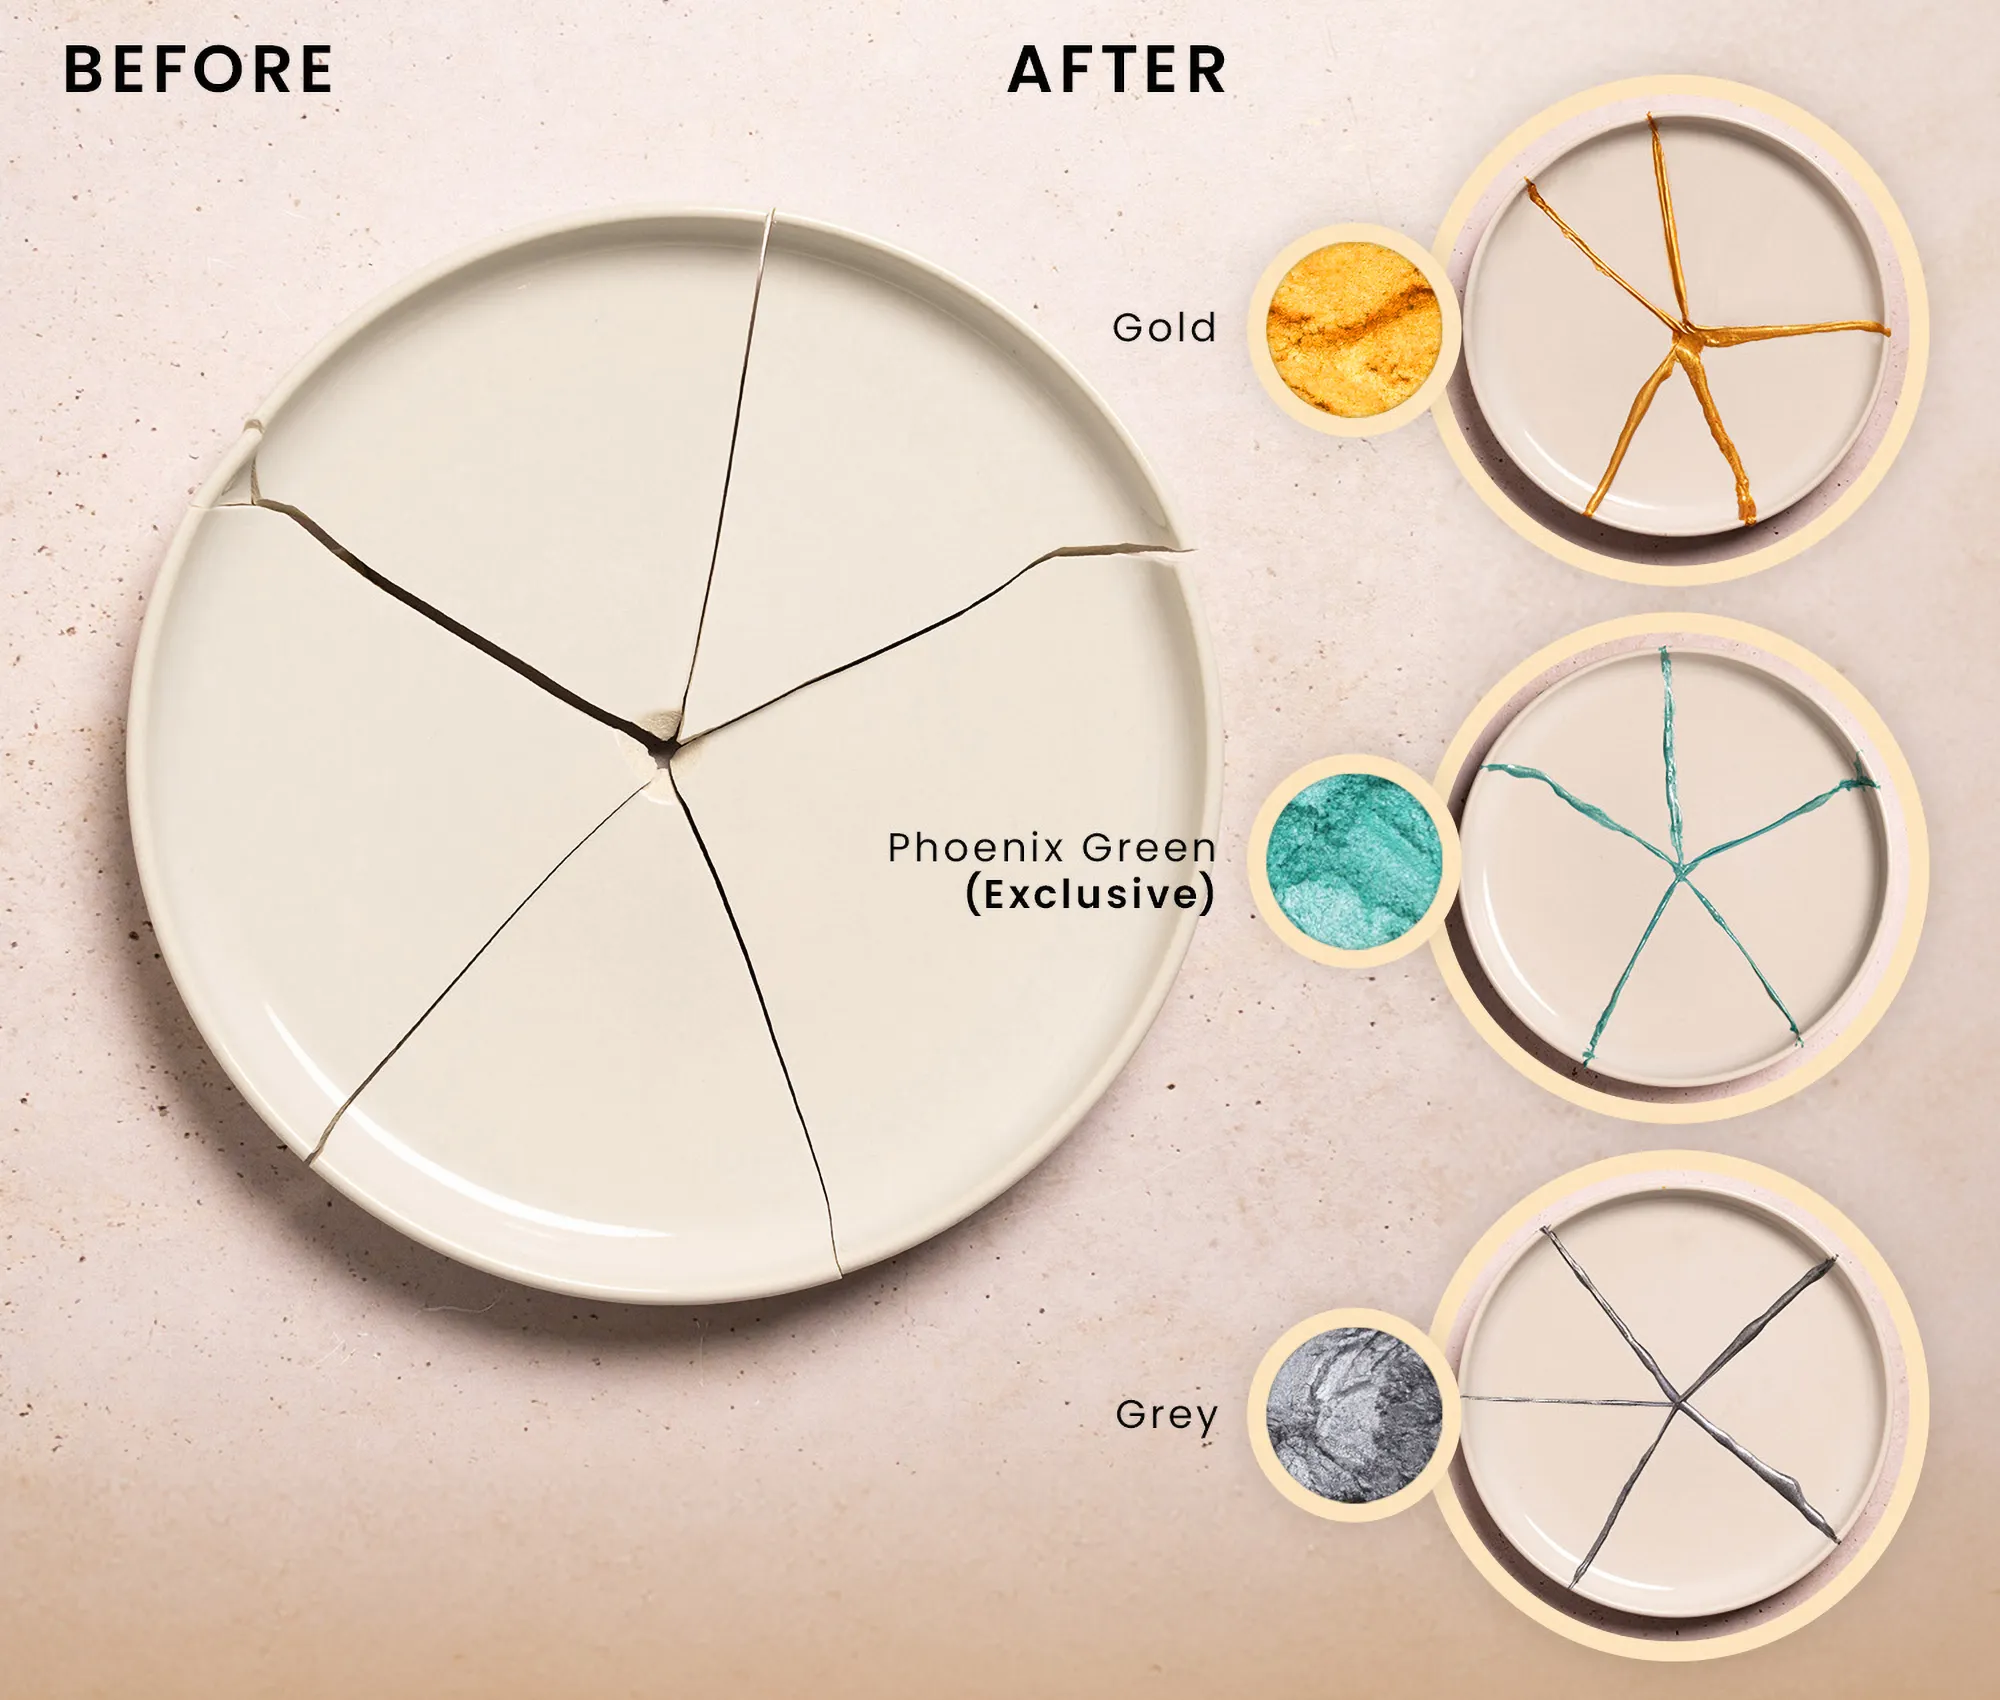
The Kivanu Kintsugi Repair Kit includes all of this, plus our exclusive Phoenix Green pigment — a color not found in any other kit — along with a full instruction guide for your first repair.
Choosing Your First Piece to Repair
This is one of the most important decisions a beginner makes — and one of the most overlooked. Not all breaks are equal.
Best pieces to start with:
- A ceramic bowl, mug, or plate with clean, straight breaks — ideally 2 to 4 pieces
- Breaks where the edges fit together clearly without gaps
- Something you genuinely care about — the emotional connection is part of what makes the process meaningful
Pieces to avoid for your first repair:
- Objects with many tiny fragments or shattered edges (too complex for a first attempt)
- Very thin porcelain (harder to handle and bond cleanly)
- Anything with a non-porous glaze that covers the break area entirely (the epoxy won't grip as well)
Tip: If you don't have a broken piece you love, a thrift store mug deliberately broken into 2–3 clean pieces makes an ideal practice object for a first attempt.
Setting the Right Expectations
Before you mix a single drop of epoxy, it helps to understand what you're actually signing up for — because Kintsugi rewards patience in ways that modern life rarely does.
Time. A typical first repair takes about 2–3 hours of active work, spread over 24–48 hours. The epoxy needs curing time between stages; you cannot rush this. Plan to start a repair you won't need to finish the same evening.
Precision, not perfection. Your first repair will not look like the photos you've seen online. The lines may be slightly uneven. There may be small bubbles or rough edges. This is normal — and after sanding and polishing, more of those imperfections disappear than you'd expect. The rest become part of the piece's character.
The meditative quality is real. Many people who try Kintsugi describe the process as unexpectedly calming — the slow mixing, the careful application along a crack line, the waiting. Don't be surprised if you find yourself genuinely enjoying the pace.
The 5 Stages of a Kintsugi Repair
Here's what the process looks like at a high level. For the full technical instructions with photos, see the Kivanu repair manual.
Clean all broken edges thoroughly — any grease, dust or old adhesive will prevent bonding. Let them dry completely. This step matters more than most beginners realize.
Combine the two epoxy components at the correct ratio on a clean surface. Add your chosen metallic pigment and mix until the color is fully incorporated. Work quickly — most epoxies begin to thicken within 5–8 minutes.
Using a fine bamboo tool or brush, apply a thin, even layer of tinted epoxy along one set of broken edges. Less is more — excess epoxy that squeezes out creates more cleanup work later.
Press the pieces together firmly and hold for several minutes. Use tape, rubber bands, or a small clamp to keep them in position while the epoxy cures. Leave undisturbed for at least 24 hours.
Once fully cured, gently sand any raised edges with fine-grit sandpaper. Wipe clean, then apply a final dusting of metallic pigment to enhance the gold effect. The crack lines will catch the light differently depending on the angle — this is the moment the piece comes to life.
The 3 Most Common Beginner Mistakes
These come up again and again with first-time repairs — knowing them in advance saves you from learning the hard way.
1. Using too much epoxy
The instinct is to apply generously, to make sure the bond is strong. But excess epoxy squeezes out of the join and hardens in blobs around the crack line — which then requires careful sanding to remove without damaging the surrounding ceramic. Apply thinly, and if needed, do a second pass after the first cures.
2. Rushing the cure time
Epoxy that looks set on the surface may still be soft underneath. Moving or stressing the join too early risks a weak bond that fails later. Follow the cure times in your kit guide — even if the piece looks done.
3. Starting with a too-complex piece
A bowl in twelve fragments is not a beginner project. The complexity of sequencing the joins — which pieces go first, how to hold them in place while others cure — requires experience to manage well. Start with two or three pieces, succeed at that, then take on the complex ones.
After the Repair: What Changes
This is the part that surprises most people the most.
A repaired piece doesn't just look different — it feels different to use. You become aware of it in a way you never were before it broke. You notice how the light moves across the gold lines. You handle it with slightly more attention. And that attention, it turns out, changes your relationship with the object entirely.
People who practice Kintsugi regularly describe a shift in how they see all their possessions — a greater appreciation for things that have been used and marked by time, rather than an urge to replace them. The Japanese call this mono no aware: the bittersweet appreciation of impermanence.
It's a lot to get from a repaired bowl. But it's consistently what people report.
Is Kintsugi Hard? The Honest Answer
Harder than it looks in social media videos — but much more accessible than most people assume.
The physical skills required are modest: steady hands for applying epoxy along a crack line, patience for the curing stages, and attention to detail during sanding. None of this requires artistic training. What it requires is the willingness to slow down and pay attention — which, for most people, is the harder part.
Most beginners who follow a good guide and use quality materials are genuinely happy with their first repair. The imperfections that do show up tend to read as texture rather than error — which is, perhaps, the most Kintsugi thing about the whole process.
Ready to start? Watch the complete repair process in video on our homepage, or follow the photo-by-photo instructions in the Kivanu repair manual.
Everything you need, in one kit.
The Kivanu Kintsugi Repair Kit includes food-safe epoxy, bamboo tools, gold and silver pigments, and our exclusive Phoenix Green — plus a full step-by-step guide for your first repair.